With build deviations, you can specify and account for changes that may be required during the build process. Notably, deviations may be used any time you need to add, remove, or substitute items on a build.
Aligni supports three types of deviations as listed below. Each type applies to a single principle part (the original part specified by the BOM). Note, however, that you may create multiple deviations for the same part since the deviation may apply to different reference designators of the part or otherwise require separate documentation of the deviation.
- Substitution – One part is substituted with another. Often, this is done when the principle part is not in inventory, but an equivalent or alternate parts is.
- Removal – One part is removed from the build.
- Addition – A new part is added to the build.
Creating a Deviation

Deviations are created during the build’s plan stage, before inventory has been allocated to the build. Create a removal or substitution deviation by clicking on the deviation button to the left of any item. Create a addition deviation by clicking on the “plus” icon at the top right of the item list.
The deviation ledger will be shown for more detailed information about the deviation. From the ledger view, click on one of the New buttons to create a new deviation. The substitution dialog is shown below offering a selection from among available part alternates as well as the total quantity to substitute.
Use the designators entry to call out specific reference designators on the BOM that you want the deviation to apply to. Aligni does not do anything with this information, but it is helpful to manufacturing personnel to understand how the deviation is to be applied. The optional comment may be used to provide a brief explanation of the deviation.

Ledger
The Deviation Ledger displays when you click on the deviation button next to an item on the build. This view shows the status of all deviations respective to the item selected. The ledger view accounts for the original quantity and any increases or decreases in quantity due to deviations, eventually resulting in a final total shown at the bottom of the ledger. Included on this ledger are the following items:
- BOM Quantity – The quantity specified on the original assembly BOM. This entry is always shown first and is denoted with the blue BOM indicator.
- Substitutions – Increases or decreases due to substitutions with other parts are shown with a “SUB” indicator. A red indication means that the quantity is decreased by substitution (with a corresponding increase in the opposing part). A green indication means that the quantity is increased by substitution (with a corresponding decrease in the opposing part).
- Additions – Increases due to “add deviations” are shown in green with a “+ADD” indicator.
- Deletions – Decreases due to “remove deviations” are shown in red with a “-DEL” indicator.
Consider the example ledger below:

Here, we read the ledger as follows:
- Item 000571 appears on the BOM with quantity 180 each.
- 150 each are removed to be substituted with item 001760.
- Finally, 30 each are removed from the build with the comment “Do not insert”.
If we review the ledger associated with item 001760 (the one used as a substitute in this example), we would see a complementary view of the substitution. From the perspective of item 001760, note that 0 each were on the original BOM and that 150 each are added as a substitute for item 000571.

Deviation Visibility
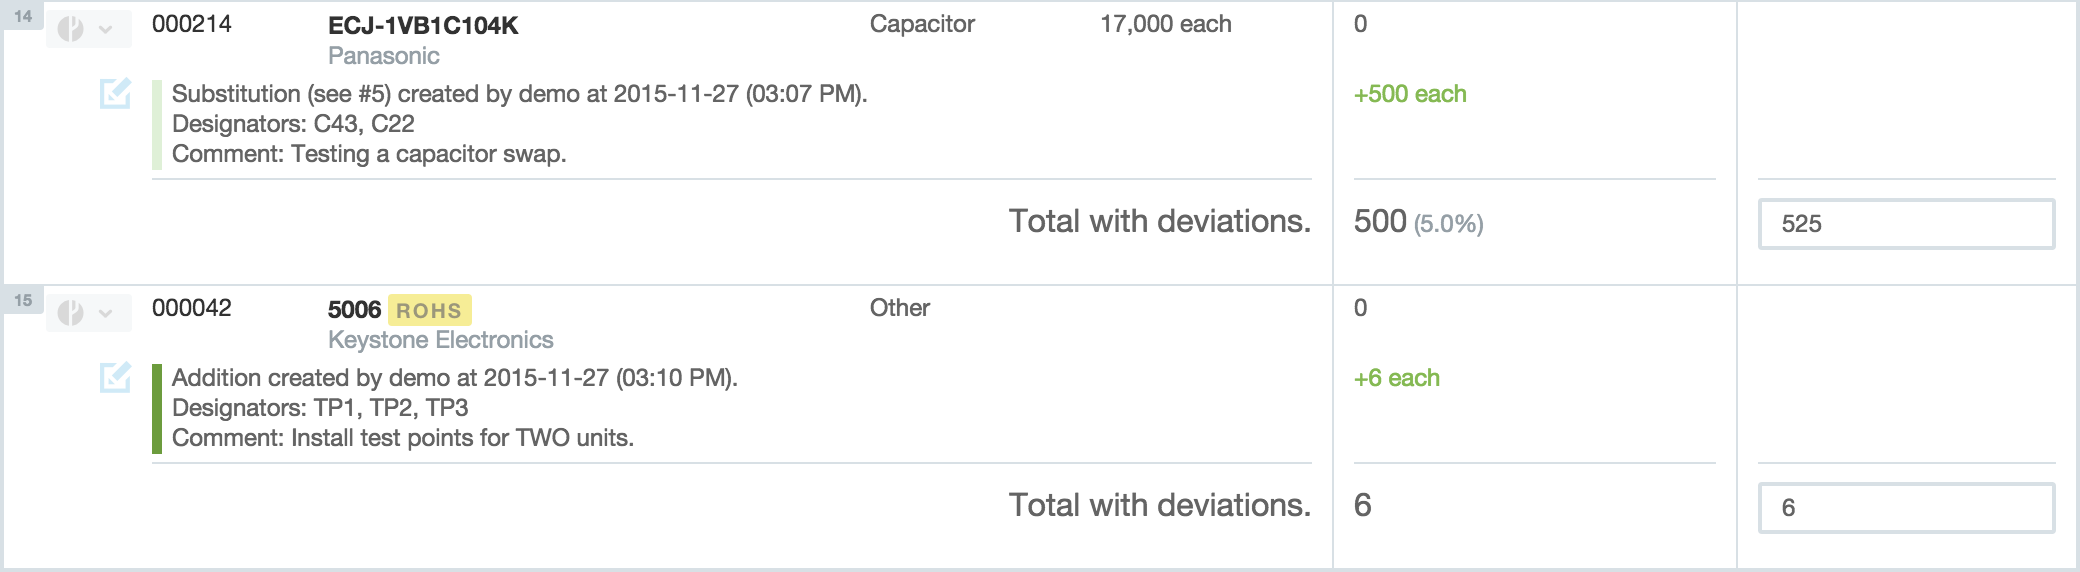
In the Plan stage, deviations are listed along with the items associated with them. All deviations applied to a particular item are listed together along with the associated quantity increases and decreases. Red and green revision bars are shown to the left of each deviation to make them more visible. Since a substitution is the combination of a removal and addition deviation, these revision bars are shown slightly lighter.
The final item quantity total is displayed beneath the deviations list for the item and the quantity entry field is displayed in the same row as this total. Note that if attrition is applied, it applies to the total quantity.
Deviations are not listed in the item list after the build has been allocated. A separate Deviations Tab (described below) can be used to see the deviations for the build.

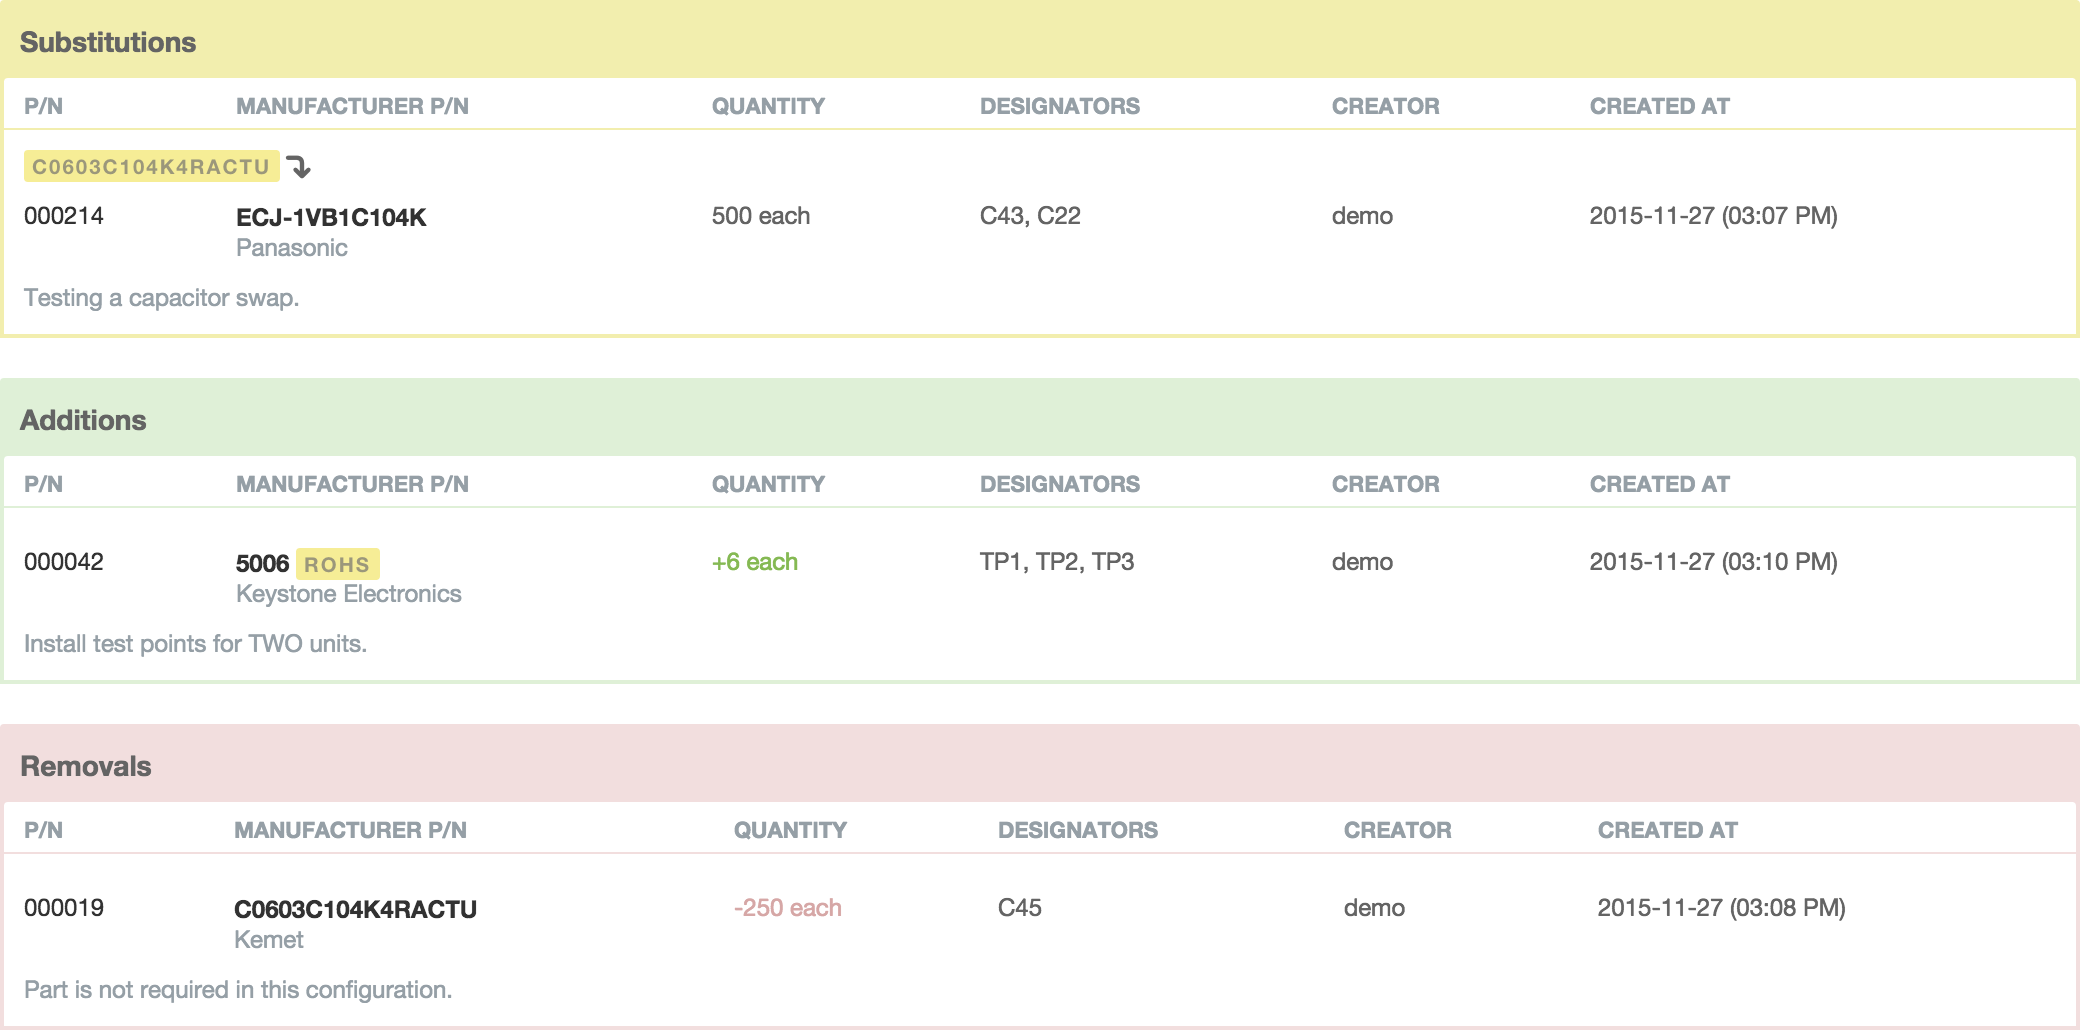
Deviations Tab
When viewing a build, the deviation tab is dedicated to listing all deviations applied to the build. The example below indicates how all three types of deviations will appear on this tab.
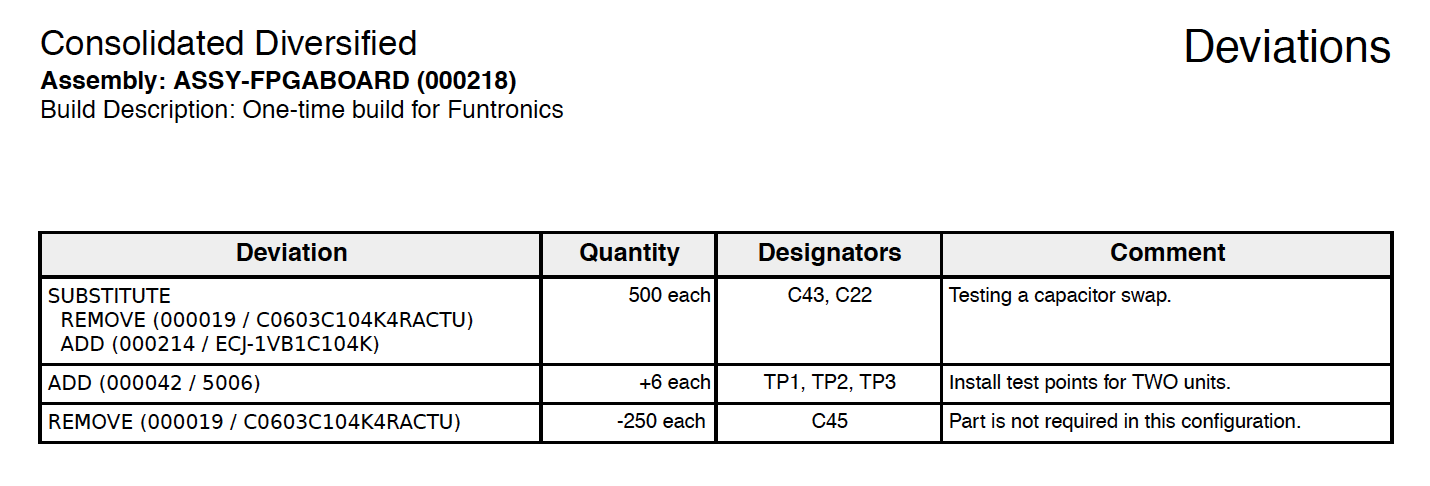
Deviation Report
The deviation report is a generated PDF that summarizes all deviations. This document could be provided to manufacturing personnel to document the required changes for the build.