Moving your data into Aligni starts with populating seven spreadsheets. These files are then uploaded directly into Aligni to automatically customize your system. To make this even easier, we’ve provided templates for each of the seven spreadsheets in the format needed to ensure success – just match your data to how we have our template set up.
Below are the steps to take to get up and running with your own data in Aligni.
Sign up for Aligni
The first step is to sign up for Aligni MRP or Aligni PLM. This grants you full access to the software chosen. Don’t worry, each of the Aligni software plans come with a free 30 day trial period – but that period is best used working on your own data!
Prepare Your Data
The fastest way to get your information into Aligni is through our spreadsheet migration process. That means getting your data into tabular format. If you’re using spreadsheets, it may be down to gathering the most up-to-date files before moving them into our templates.
If the data will be coming from another business system, then it’s important to understand the process for exporting the necessary data. Typically, these systems have CSV export functionality that can make it easier. It might be best to contact your IT or system administrator to get a better understanding of the steps required.
In either case, it’s good practice to mark down when the data was moved into Aligni to minimize losing data or doubling up data within the system.
Populate the Template Spreadsheets with Your Data
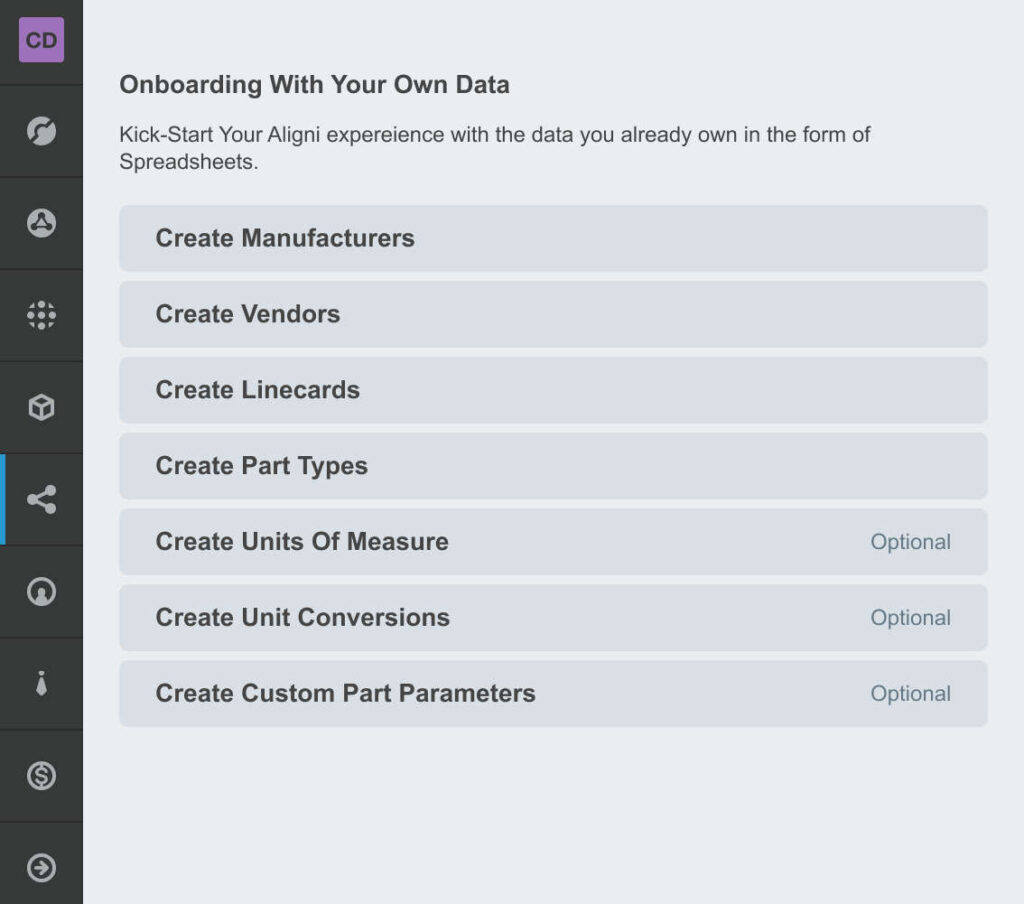
We have seven templates available to download. Each spreadsheet is linked to in the onboarding screen in your account shown at right. When clicked, each button displays a quick summary of what each sheet contains. Open each of the sheets to see the header row entries and place your data to line up with each. It’s that easy.
Follow along below as we go through each of these template spreadsheets and what information they need.
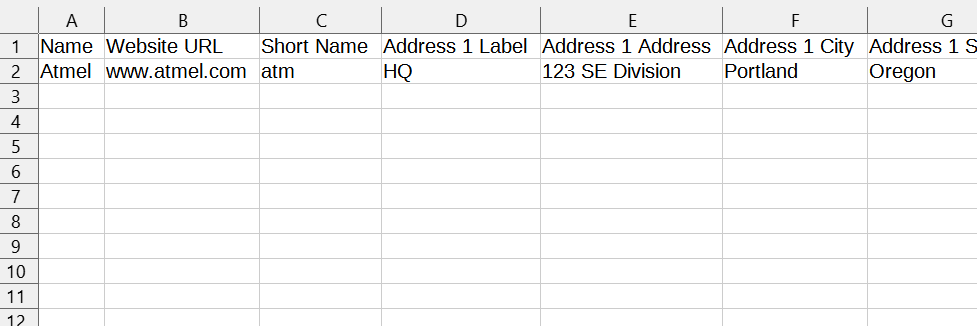
Create Manufacturers
This spreadsheet contains the names and general details of part manufacturers. Algini keeps this information separate from part vendors, as some of our customers prefer to order directly from part manufacturers for some items and through vendors for others.
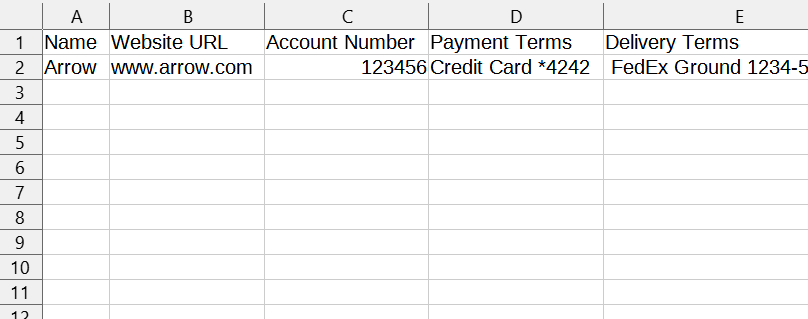
Create Vendors
Just like the Manufacturers spreadsheet, the Vendor spreadsheet contains general contact information and payment details for each supplier.
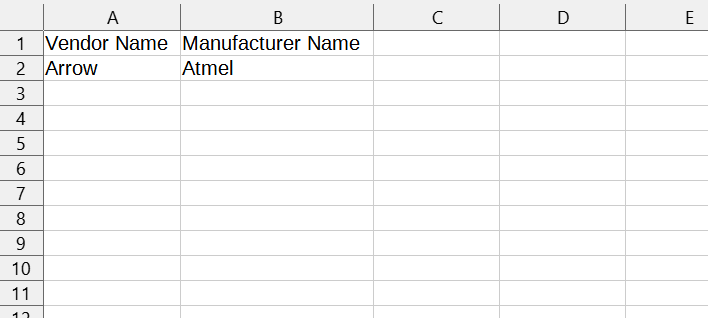
Create Line Cards
The Line Card spreadsheet is where manufacturers are connected with the vendors who carry them. It just contains two columns. One is the vendor the other is the manufacturer it carries. If a vendor carries more than one manufacturer, then the vendor gets a new row for each manufacturer until all are accounted for.
Create Part Types
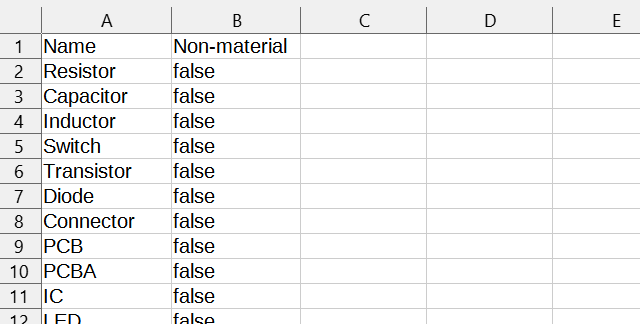
This spreadsheet is a simple list of all types of materials the company uses to manufacture its products. This contains physical items like electronic components, brackets and cases, sub-assemblies made in-house or from vendors, and materials like steel sheet or electrical cables. It also contains consumables like labor or cutting fluid or welding tips used during the process if a company desires to track them.
Create Units of Measure
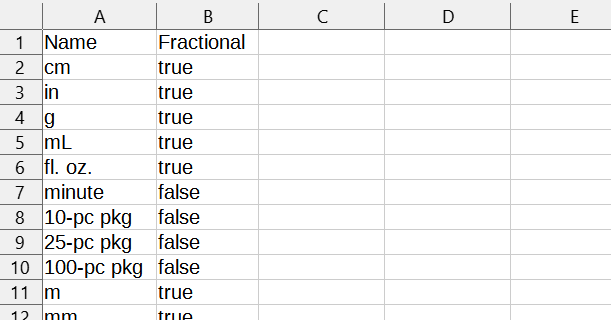
The Units of Measure file contains just what’s named, a list of all the denominations of specifications a company uses in its parts and products. It also allows the company to indicate whether the measurement is a fractional measurement or decimal.
Create Unit Conversions
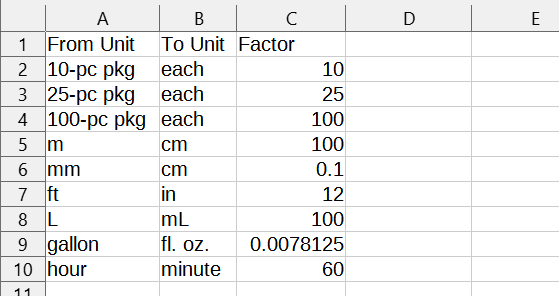
This simple file converts the previous units of measure into other common denominations. For instance, if a part typically is ordered in packs of ten, that ordered pack can be set up to contain ten individual units.
Create Custom Part Parameters
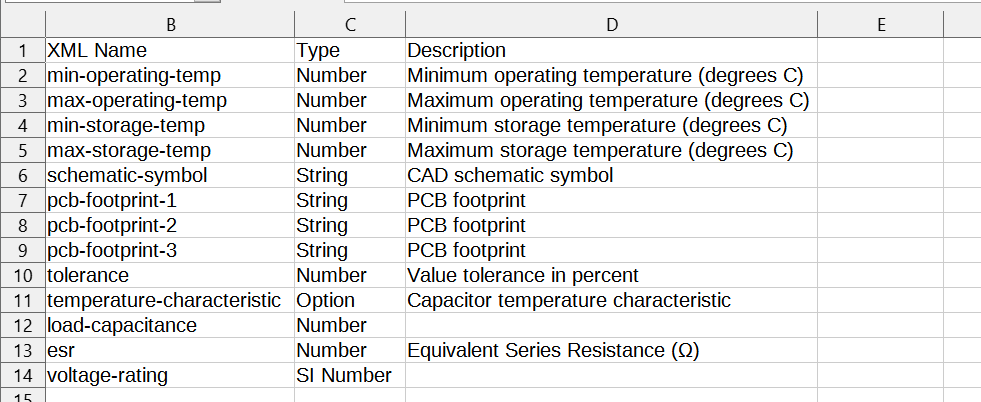
Within this document, a company can add in part information that’s specific to their processes.
After each of these spreadsheets are filled out and uploaded into Aligni, a new user is ready to start using the software by uploading parts, creating products and bills of materials, checking in inventory, and managing the quoting and vendor process based on their own data.
Bringing It All Together
It’s important to note that while these seven spreadsheets help make the transition into Aligni rather simple, it’s not necessary to make sure all your information is added in order to start using the software. In fact, many firms put together the most needed information first. Later these firms continue to add in information as they increase their use of the software.
At Aligni, we work to make this transition as easy as possible but sometimes questions arise. If you have any questions about the process or would like to learn more, please contact us via email. Aligni also offers bespoke migration support to help companies more quickly transition into our products. Contact us today for more information and pricing!

